Showing posts with label MS-Office Features. Show all posts

Thursday, May 12, 2016

Twisty or Collapse or expand parts of a document

When you’re working on a long, complicated document, you can collapse everything except the part you want to focus on. Or, if you think you might be overloading your readers with too much information, you can display summaries and leave it to your readers to open the summary and read the details if they want.

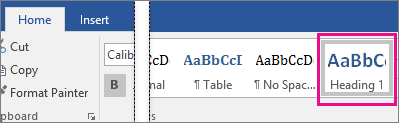
The ability to collapse and expand content in your document is based on its outline level. You can quickly add an outline level and make part of your document collapsible by adding a heading using Word's built-in styles.


After applying the heading style, you’ll see a small triangle when you move your cursor over the heading. Click the triangle to collapse the body text and subheadings below it.


TIP:  If you’re working on a touch device, tap to place your cursor in the heading to see the triangle.
Click the triangle again to expand that part of the document.
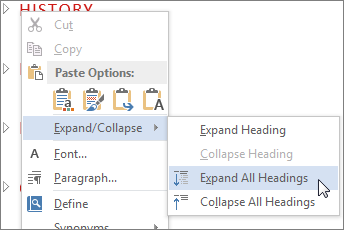
To collapse or expand all the headings in your document, right-click the heading and click Expand/Collapse > Expand All Headings or Collapse All Headings.


When you close and reopen a document, the headings will be expanded by default. If you want the document to open with the headings collapsed, follow these steps.

1) Place your cursor in the heading.
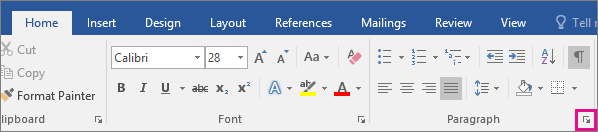
2) On the Home tab, click the arrow in the Paragraph group.


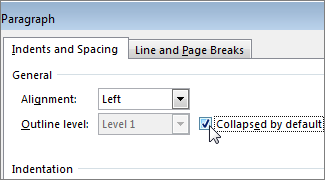
3) In the Paragraph dialog box, click the checkbox next to Collapsed by default.


4) Click OK.

Contents are reference from Site

Thursday, July 3, 2014

Calculate Time in Excel

The simple way to calculate the time is sum the two time inputs, shown in below example:

Use Excel built-in function SUM to calculate. Use same as you calculate any number:
Below mention three cells A1, A2 and A3 formatted as time (hh:mm)

A1 = 04:15
A2 = 10:15
A3 has the formula: =SUM(A1:A2)

then A3 will have the correct values of 14:30.

This is only useful until total is below 24 hours, but if your total times are greater than 24 hours then things get different, it will round the calculation and start from beginning and you won't get correct answer.

e.g.: If you have :
A1 = 15:30 and A2 = 10:15 then A3 will have 01:45 instead of 25:45. I.e. any hours beyond 24 hours are dropped.

To retain the hours beyond 24, you have two alternatives:

1. If you want to convert the hours beyond 24 into days then use this cell format : dd:hh:mm. The total in the previous example will be 01:01:45 (1 day , 1 hour and 45 minutes)

2. If you want to keep the hours beyond 24 as is then use this cell format :[h]:mm. The total in the previous example will be 25:45.

In both cases the formula will remain as it is. Only the cell format differs.

Friday, August 20, 2010

Quick Remove Hyperlinks From Microsoft Word Documents

On many occasions you might need to extract some articles from web pages, emails and other sources into the Word documents for reference or other purposes. When you copy and paste the articles or paragraphs into the word documents, you will notice that the hyperlinks attached to some words or sentences will be copied and pasted to the word documents as well. These hyperlinks are web links, internal links within the same document or email addresses. Some of these hyperlinks might not be valid or may direct you to irrelevant websites.

If the references to these hyperlinks are not so critical or necessary and you would rather remove them and have plain text, of course you can right click to the hyperlinks and select “Remove Hyperlink” to delete the links one by one. This can be rather time consuming and tedious if your copied texts are substantial in length or have a lot of hyperlinks. If you have encountered this problem, a quick way to remove all hyperlinks within a document is by highlighting the documents and pressing Ctrl-Shift-F9. By pressing these three keys, the hyperlinks will be removed instantly.

Similarly when you type or paste a URL into a word document, you will also notice the URL be automatically converted into a hyperlink. You can right click to delete the hyperlink by clicking on the “Remove Hyperlink” icon or pressing Ctrl-Shift-F9 to clean all the hyperlinks once you have finished the document. Having said that, instead of removing the hyperlinks once you are done, you can actually change the default setting so that when you type a web site or URL, it will not automatically turn this into a hyperlink. To change the setting, you can refer to the following guideline:

In Microsoft Office Word 2007, follow these steps:

  • Click the Microsoft Office Button, and then select Word Options.
  • Click Proofing, and then click AutoCorrect Options.
  • On the AutoFormat as you type tab and on the AutoFormat tab, click to clear the Internet and network paths with hyperlinks check box, and then click OK.
  • Click OK to close the Word Options dialog box.
In Microsoft Office Word 2003 and in Microsoft Word 2002, follow these steps:
  • On the Tools menu, click AutoCorrect Options.
  • On the AutoFormat as you type tab and on the AutoFormat tab, click to clear the Internet and network paths with hyperlinks check box.
  • Click OK.

Set Optimum Screen Resolution for PowerPoint Presentation

Users who need to do a lot of presentations have probably faced these embarrassing situations: the projection result is unacceptable or the slideshow is too blurred or the slideshow is extremely slow. This happens when presenters try to connect their laptop to the venue’s projectors and is a result of resolution compatibility issues. For instance, sometimes the PowerPoint slideshow’s resolution setting and the projector’s resolution setting is different. Thus, the incoming slideshow images will automatically be stretched to match the projector’s resolution and the result will be blurred.

In fact many users generally do not know that Microsoft PowerPoint allows users to adjust the slideshow resolution to be aligned with the projector’s resolution. Presenters can adjust their slideshow’s resolution instead of using the default screen resolution for better effect. Users can choose smaller resolutions for higher speed or larger resolutions to show more visual detail. To set the PowerPoint slideshow’s resolution, users just need to go to the Slideshow Tab and look for the “Resolution” item. Users can click and choose their preferred resolution on the dropdown menu as shown in the photo below: